
Painting the interior of your home is one of the easiest and most cost-effective ways to give your living space a fresh, new look. A well-chosen color scheme can brighten a room, add warmth, or create a modern atmosphere that reflects your style. But interior painting is not just about grabbing a brush and applying paint; it requires planning, preparation, and proper technique to achieve a professional-quality finish. With guidance from experts at Us Builders Team LLC, you can avoid common mistakes and transform your home beautifully.
Why Interior Painting Is More Than Just Color
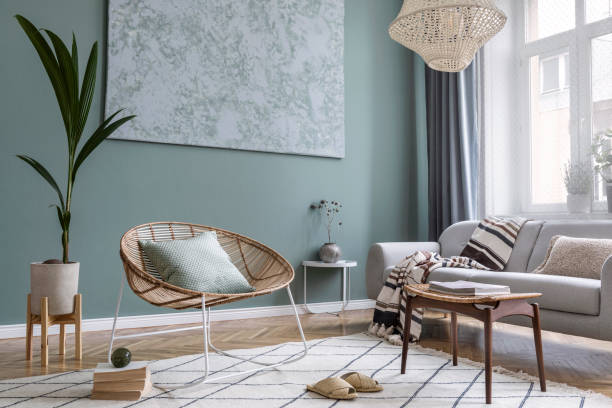
Interior painting is often underestimated, but it plays a vital role in setting the mood of your home. The right shades can completely change the perception of a room. Lighter colors make small spaces feel larger and more open, while darker tones add depth and character. Fresh paint also hides imperfections, covers stains, and provides a clean slate. Many experts call painting the most affordable form of renovation, and it’s easy to see why—it brings dramatic change without requiring a full remodel.
Preparation Is the Key to Success
Every successful painting project begins long before the first coat is applied. Proper preparation ensures the paint adheres well and the results last longer. Walls should be cleaned thoroughly to remove dust, grease, and dirt that could prevent smooth application. Cracks, dents, and holes must be filled and sanded down to create an even surface. Just as important is protecting your space—furniture, floors, and fixtures should be covered, and painter’s tape should be applied around edges and trims to achieve sharp, professional lines. Without preparation, even the best paint will not deliver the finish you expect.
Quality Tools and Paint Make All the Difference
Another expert recommendation is to never compromise on tools and materials. The brushes, rollers, and paint you choose directly affect the final look. For example, rollers with short naps work better on smooth walls, while textured surfaces require longer naps. Angled brushes help cut clean corners, while flat brushes are perfect for straight edges. Most importantly, high-quality paint ensures durability, richer color, and fewer coats. Professionals often say that investing in better products at the start saves time, money, and frustration in the long run.
Choosing the Right Color for Your Space
Selecting paint colors is often the most exciting part of the process, but it can also feel overwhelming. Experts recommend always testing samples on your wall before committing, since colors appear different under natural daylight compared to artificial light. The mood of each room should guide your decision—warm shades like beige, cream, or yellow bring coziness, while cooler tones like gray or blue promote calmness and focus. It’s also important to consider how the color interacts with your furniture, flooring, and decorative accents. For a safe approach, neutrals work well in large spaces, while bold colors can add personality to an accent wall.

Why Primer Should Not Be Skipped
Many people skip primer, but it’s a step professionals rarely ignore. Primer ensures:
- Better paint adhesion
- A uniform surface for even color
- Reduced number of coats needed
- Longer-lasting finish
If you’re painting over dark colors, stains, or freshly patched areas, primer is essential. For lighter walls, consider paint-and-primer-in-one options.
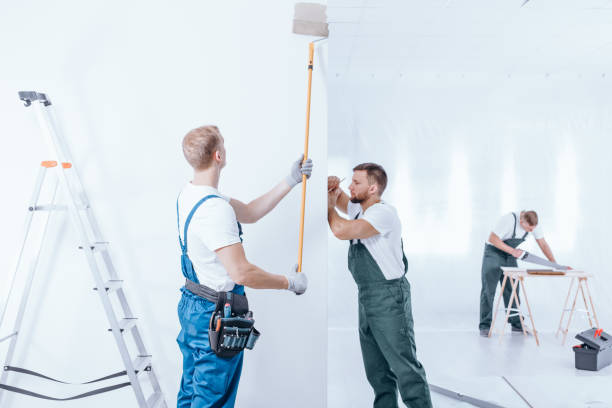
Mastering the Right Painting Technique
Painting is more than simply rolling color across a wall; it is about technique. Professionals usually start by cutting in with a brush along edges, corners, and trims before switching to a roller for the larger surfaces. The roller is moved in a “W” pattern to spread paint evenly without streaks. Overloading brushes or rollers with too much paint leads to drips and uneven coats, while working wall by wall helps maintain a wet edge, preventing visible lines. These small details in technique can make the difference between a DIY look and a polished professional result.

The Value of Applying Multiple Thin Coats
Many beginners assume one thick coat will save time, but this usually results in streaks and uneven coverage. Experts recommend applying two or even three thin coats instead, allowing each layer to dry fully before adding the next. This method not only ensures even color distribution but also creates a more durable finish that resists peeling and wear. Patience during this stage pays off in the long run, leaving you with walls that look flawless.
Paying Attention to Finishing Touches
The little details often separate DIY jobs from professional ones.
- Remove painter’s tape while the paint is still slightly wet to avoid peeling.
- Touch up small spots with a fine brush.
- Clean brushes and rollers immediately after use to extend their life.
- Reinstall outlet covers, switch plates, and fixtures for a clean finish.
These final steps ensure your space looks polished and complete.
Professional Tips for an Expert Finish
Professionals also rely on a few tricks to make the job easier and the results more refined. Natural daylight is the best time to paint, since it shows the true shade and makes missed spots easier to catch. Maintaining a wet edge by overlapping strokes avoids lap marks. Allowing proper drying time between coats prevents cracking and peeling. Even storing leftover paint upside down in a tightly sealed can helps maintain its quality for future use. These small practices, though often overlooked, are what keep a painted wall looking great for years.
Common Mistakes to Avoid
Even with the best intentions, homeowners often make these errors:
- Skipping prep work
- Using cheap paint or tools
- Choosing colors without testing
- Applying thick, uneven coats
- Ignoring ventilation (paint fumes can be harmful)
By avoiding these mistakes, you’ll save time, money, and frustration.
Conclusion
Interior painting is a rewarding project that brings both immediate and lasting benefits. With the right preparation, tools, colors, and techniques, you can achieve a professional-looking finish without the need to hire a contractor. These expert interior painting tips highlight that success comes down to patience, precision, and attention to detail. Whether you are refreshing a single room or giving your entire home a new look, the key is to treat painting as both an art and a process. With thoughtful planning and expert best practices, your home will reflect the fresh, vibrant atmosphere you envision.
FAQs
What is the best way to prepare walls before painting?
Clean the walls, repair cracks, and sand the surface to create a smooth base for paint.
Do I need to use primer before painting?
Yes, primer helps paint stick better, provides even coverage, and makes the finish last longer.
How many coats of paint are recommended for walls?
Usually two thin coats are enough for smooth, even coverage.
What type of paint finish is best for living rooms?
Satin or eggshell finishes are ideal as they provide durability with a soft sheen.
How long should I wait between coats of paint?
Wait at least 2–4 hours between coats to allow proper drying.